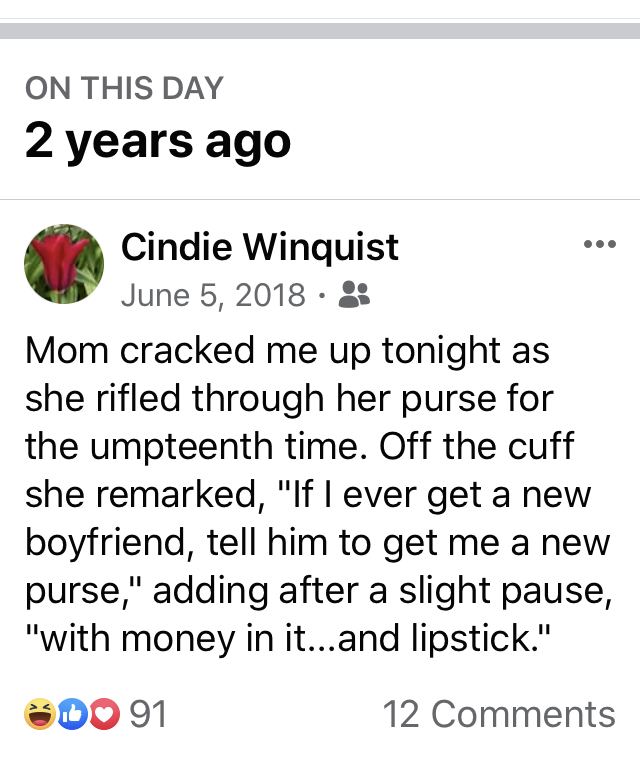
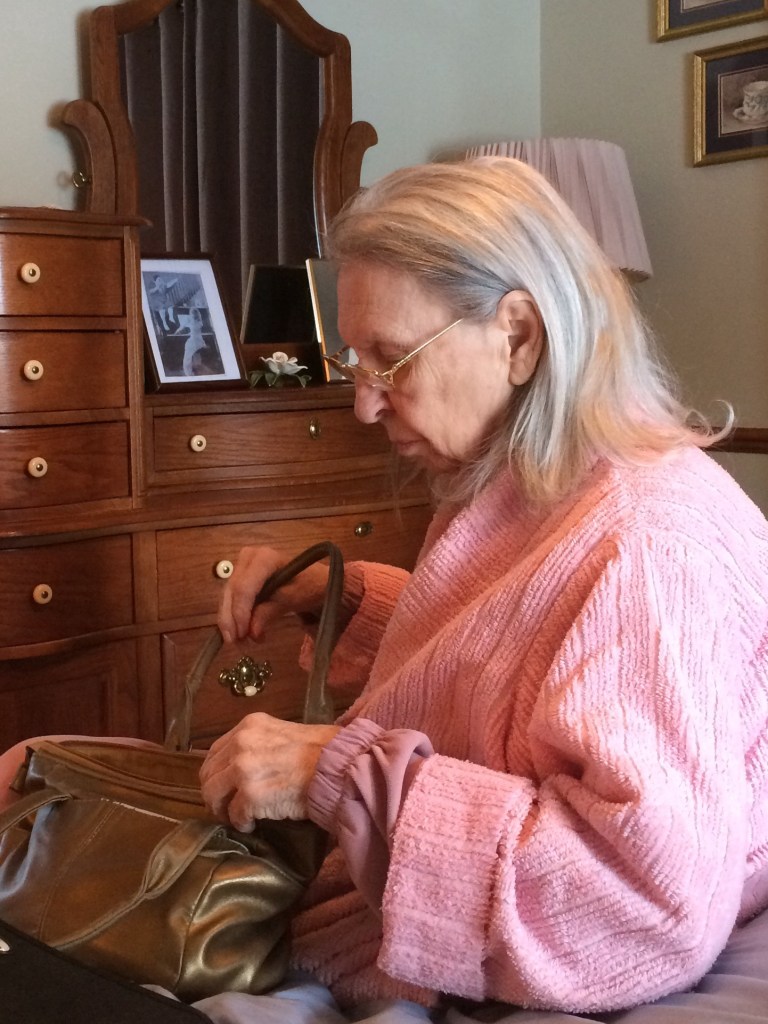
I had to laugh when I stumbled once again upon this screenshot. Oh, my sweet momma could have me in stitches.
Her purse came with her for snack time at Beehive, oftentimes carrying an extra snack or two given to her by the caregivers. I mean, who could resist giving this pretty lady an extra snack or two?
Whether living with me, or living at Beehive Homes of Oregon (WI), momma’s purse was always within reach. Sorting through her purse was a favorite middle of the night activity, so I tried to keep it stocked with all kinds of treasures and little things to sort and discover over and over again.
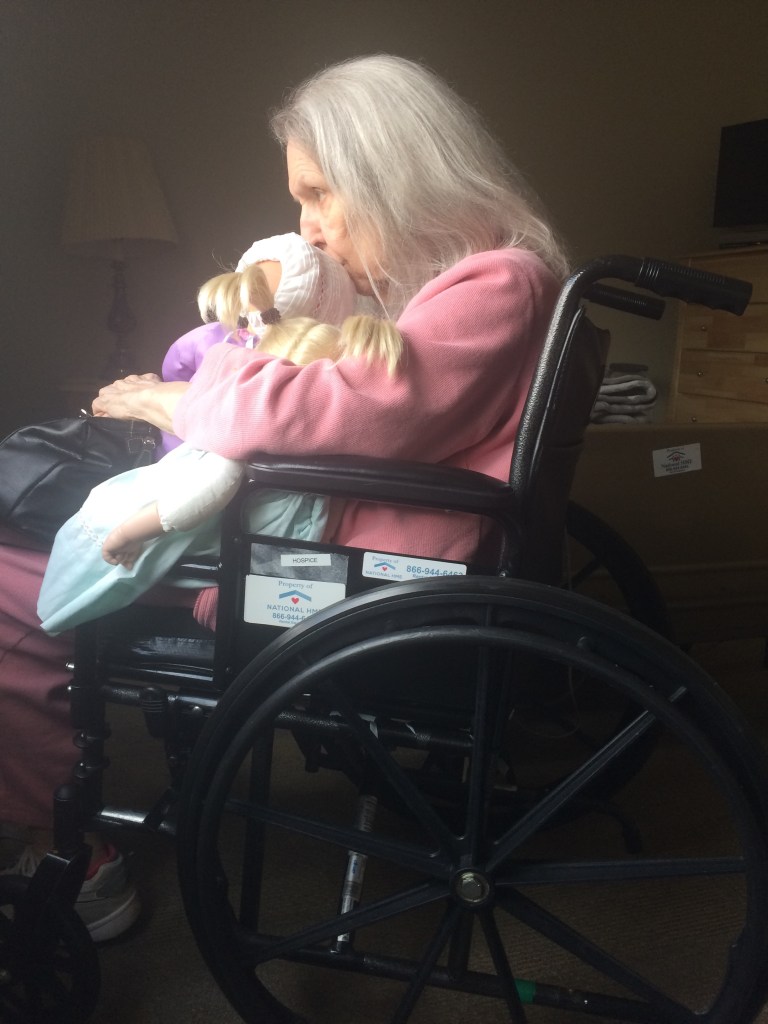
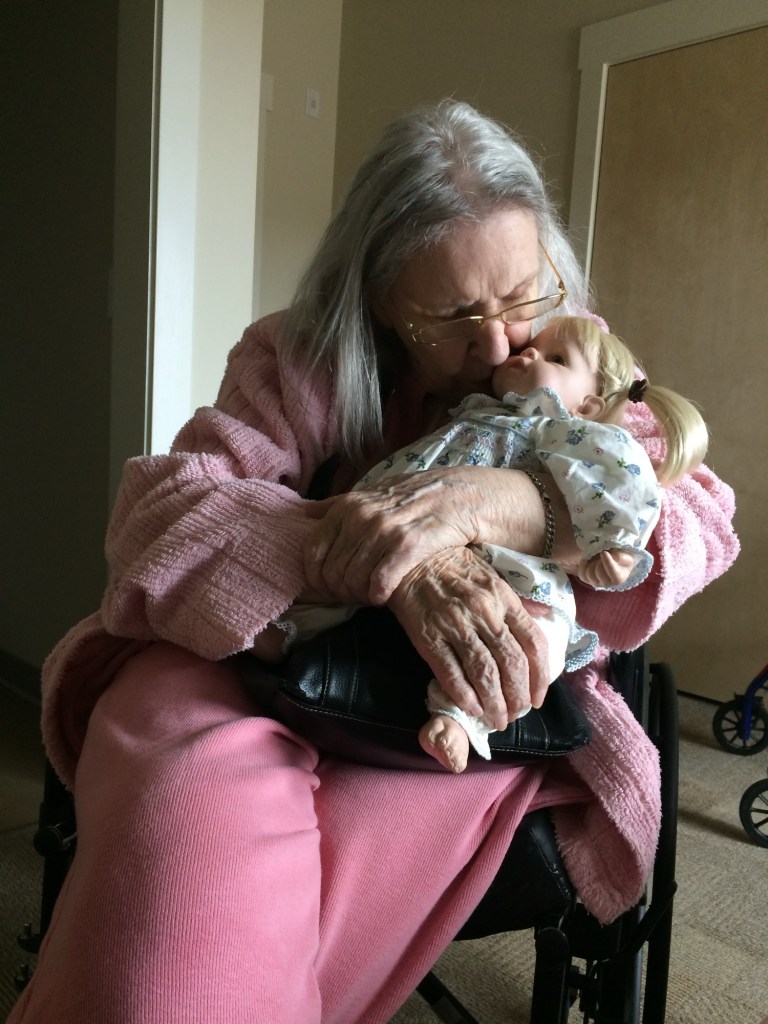
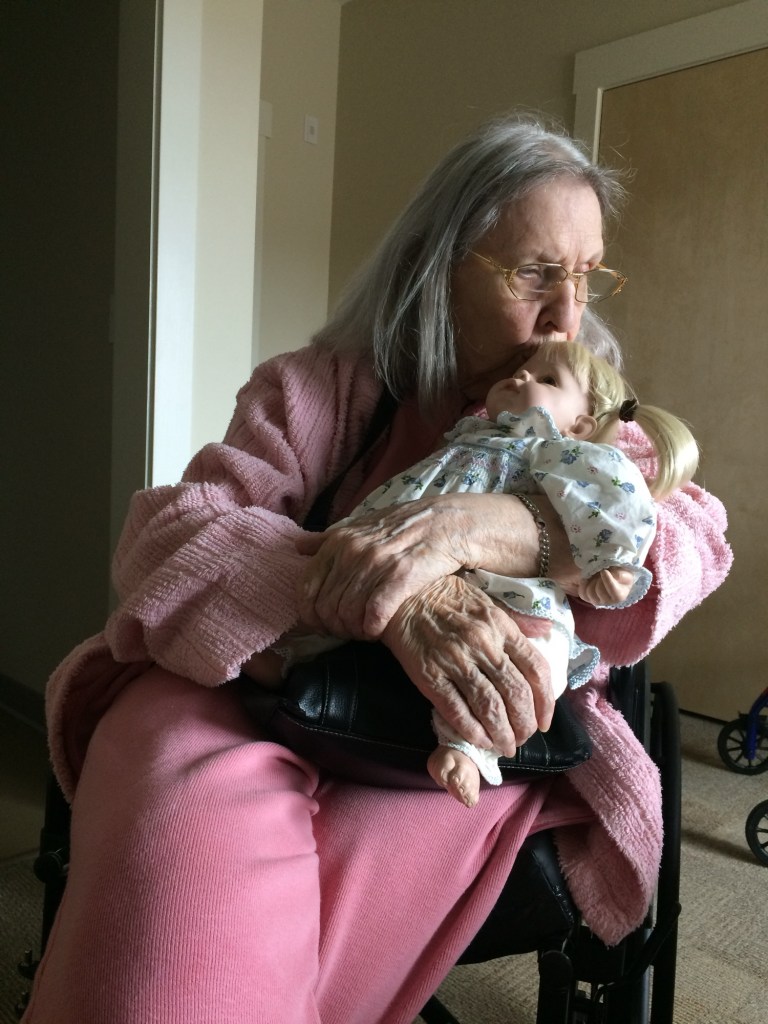
Momma and her babies
Momma always seemed to have her purse along when she was caring for her baby, Dolly. The purse would usually be in her lap with her baby sitting on top. I treasure the sweet memories of my momma loving on Dolly. They gave me little glimpses of the love and gentle kisses I know she once bestowed on me.
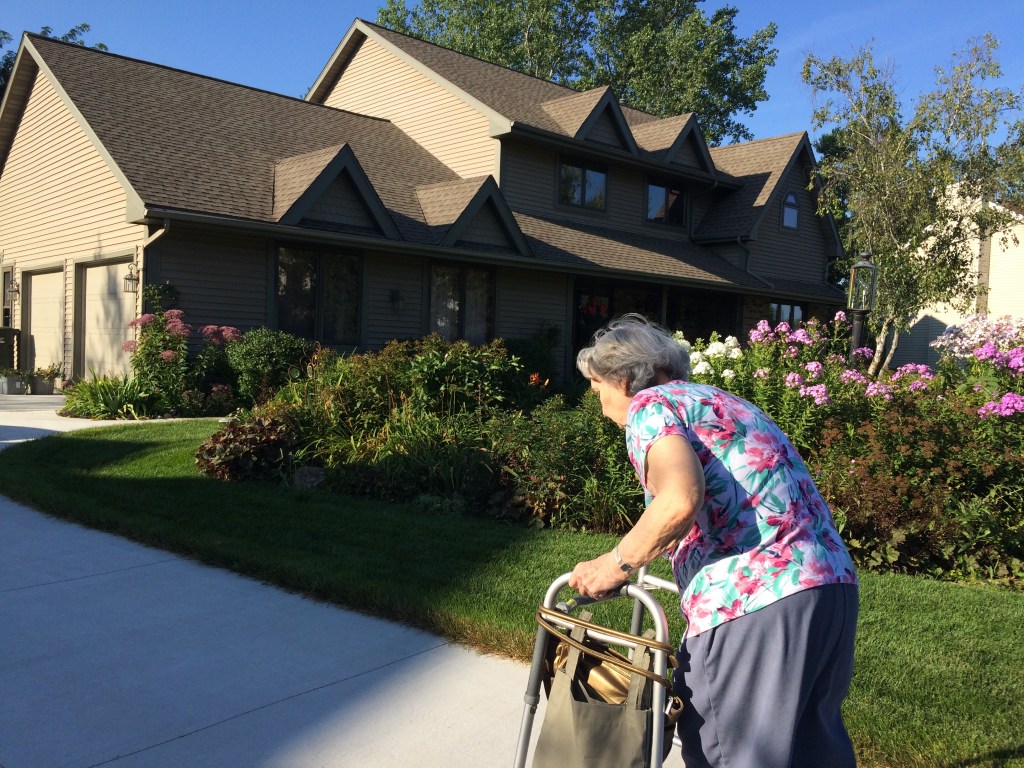
Never leave home without it
A woman never wants to leave the house without her purse, you know. We even rigged her walker so she could take her purse with her on our little walks to the mailbox and back.
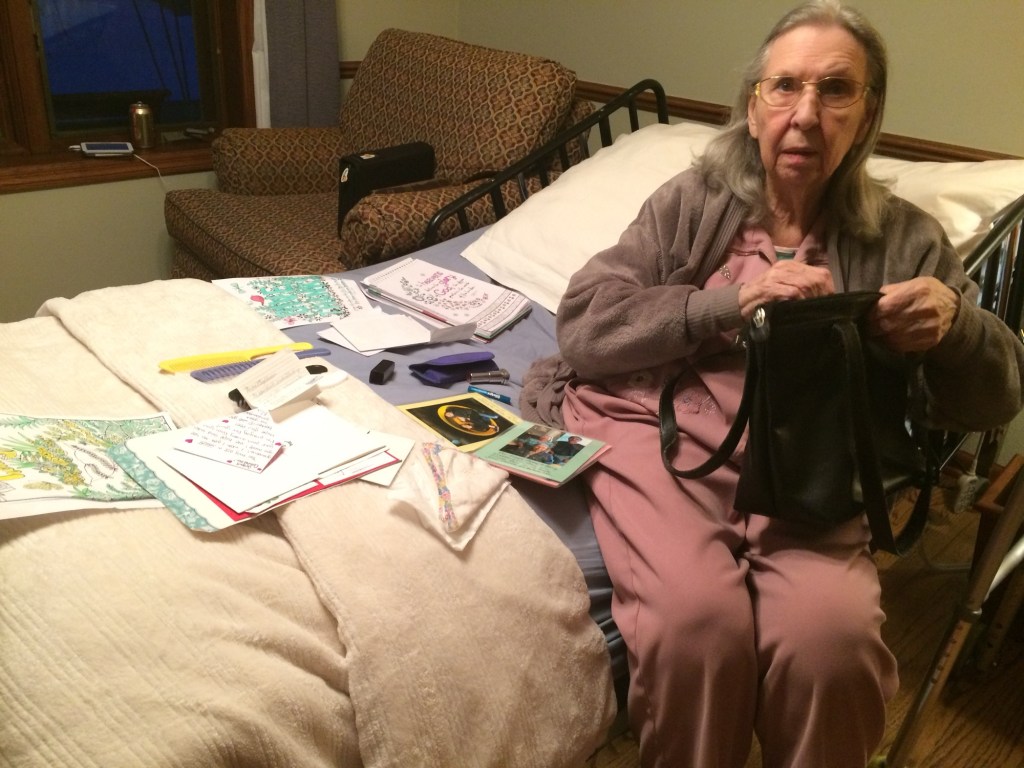
An early sign of cognitive decline
Momma’s purse held one of the earliest signs of cognitive decline. I remember a day when I was visiting mom and helping her search for her lost checkbook. Her purse was one of those multiple zippered pocket contraptions that seemed to always swallow her car keys, wallet, hearing aides, and checkbook. As I once again searched the pockets she had already searched, I found both the lost checkbook and a list written in my mom’s familiar cursive hand. The list told a story of something else that was lost–the names of her very best friends at church. My sweet momma had taken her church bulletin and had practiced recalling and writing their names over and over again, willing herself to never forget them again.
Life at Beehive is somehow better when there are fresh baked cookies involved.
Thursday is ‘Cookie Day’ at BeeHive where I consider it my mission to fill our assisted living memory care home with the amazing aroma of freshly baked cookies. In a world where memories are fading day by day, homemade cookies have a way of sparking memories from the personal baking experiences of yesteryear. My cookie recipe rotation includes classic favorites like chocolate chip, Snickerdoodles, peanut butter, and oatmeal raisin. When it’s oatmeal raisin’s turn on the menu, I sometimes make a special batch of thinner oatmeal cookies without raisins, adding just a hint of molasses.
I use Amanda Rettke’s recipe for “Oatmeal Cream Pies” found on her wonderful I Am Baker website. This cookie dough does require some chill time in the fridge. Rather than chilling the whole bowl of dough, I pre-scoop all of my cookies into uniform balls straight onto a few cookie sheets with only a tiny bit of space between each dough ball. I then slide the cookie sheets into a fridge and let them chill for about 30 minutes to an hour while I clean up my work station.
When it’s time to bake, I just place those chilled dough balls on a parchment-lined cookie sheet, spacing them appropriately so they can flatten and spread as they bake. As you can see in the photos, I do not use a cooling rack. After the cookies have cooled a bit on the cookie sheet, I slide the parchment paper straight onto the countertops to let them finish cooling.
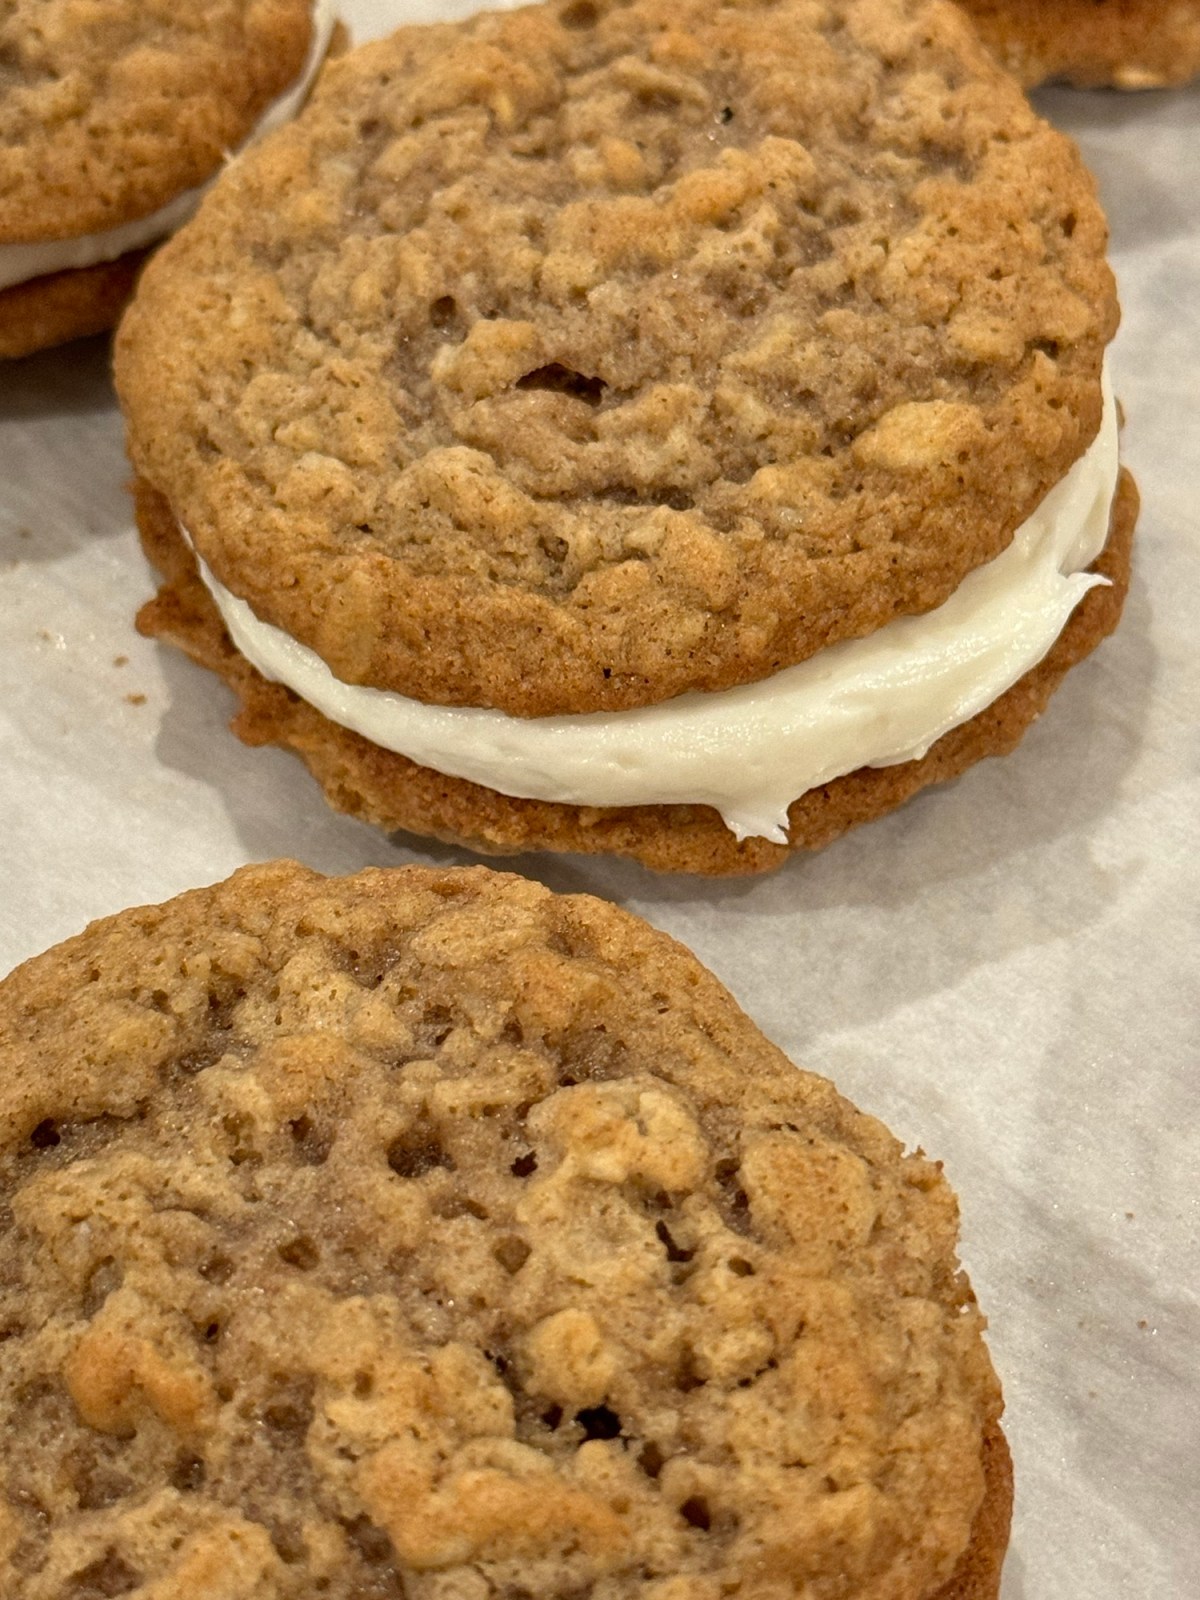
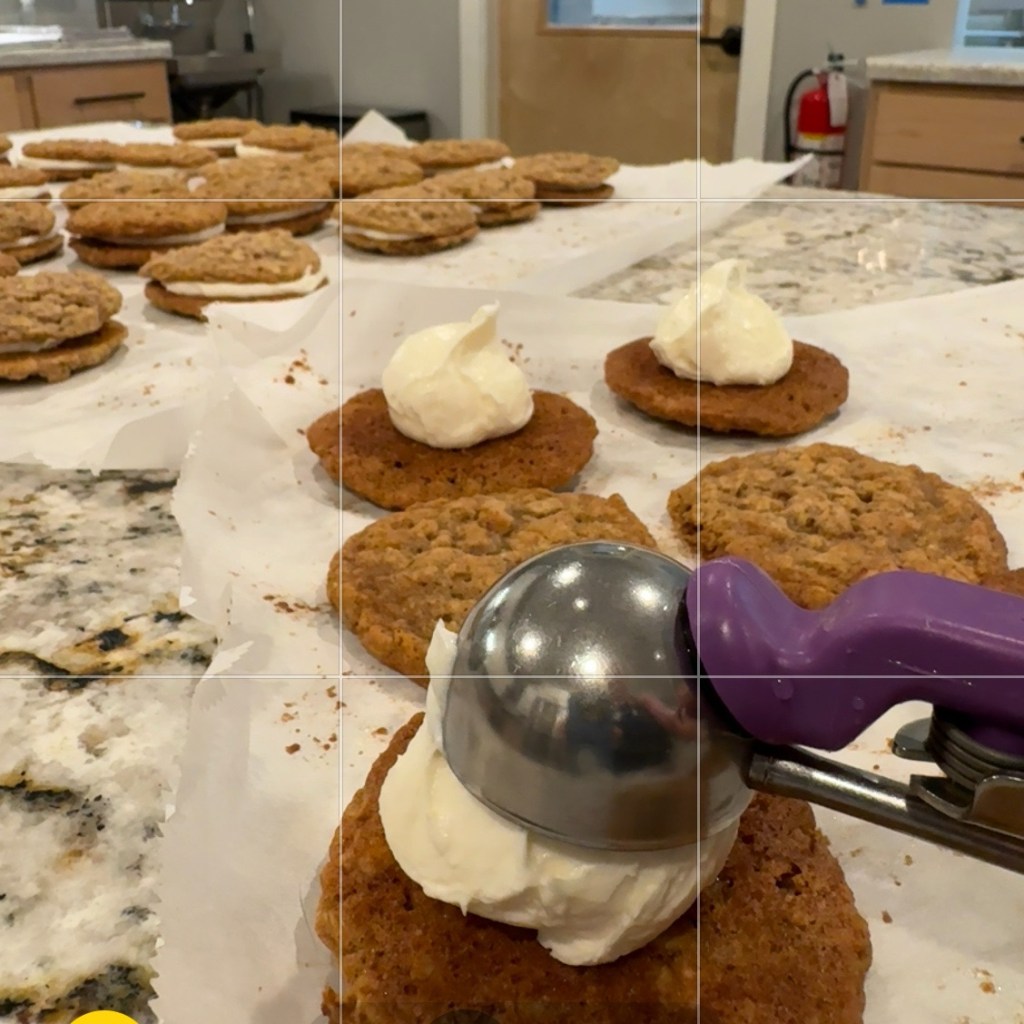
Scooping delicious marshmallow-filled oatmeal cookies reminiscent of classic lunchbox treats.
While dozens of cookies are cooling on every available countertop and flat surface, I then create a marshmallow filling to sandwich between pairs of the cookies. The result is reminiscent of Little Debbie Oatmeal Creme Pies — a popular lunchbox treat straight out of the 1960’s and still available today.
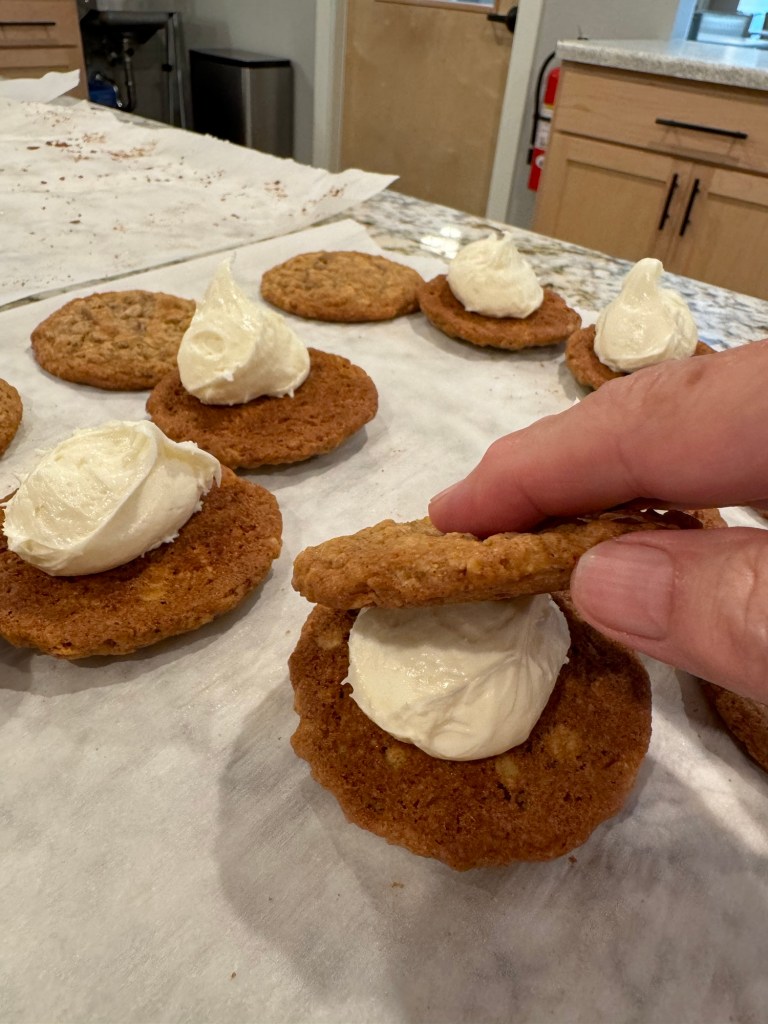
Since I use a cookie scoop, the cookies bake up fairly uniform in size, which makes the next step a little easier. I pair the cookies up and flip one of each pair upside down. Using a slightly smaller scoop, I add a dollop of marshmallow creme filling on one half (flat-side up), then top it with the other half and give it a little squish, stopping once the filling just reaches the edges of the cookie sandwich.
I let the cookies sit on the countertop to set up a bit until just before serving time. By this step in the cookie baking operation I usually have a little audience of residents standing at the window into the kitchen. They truly enjoy watching me bake and eagerly anticipate getting to eat the cookies after their lunch.
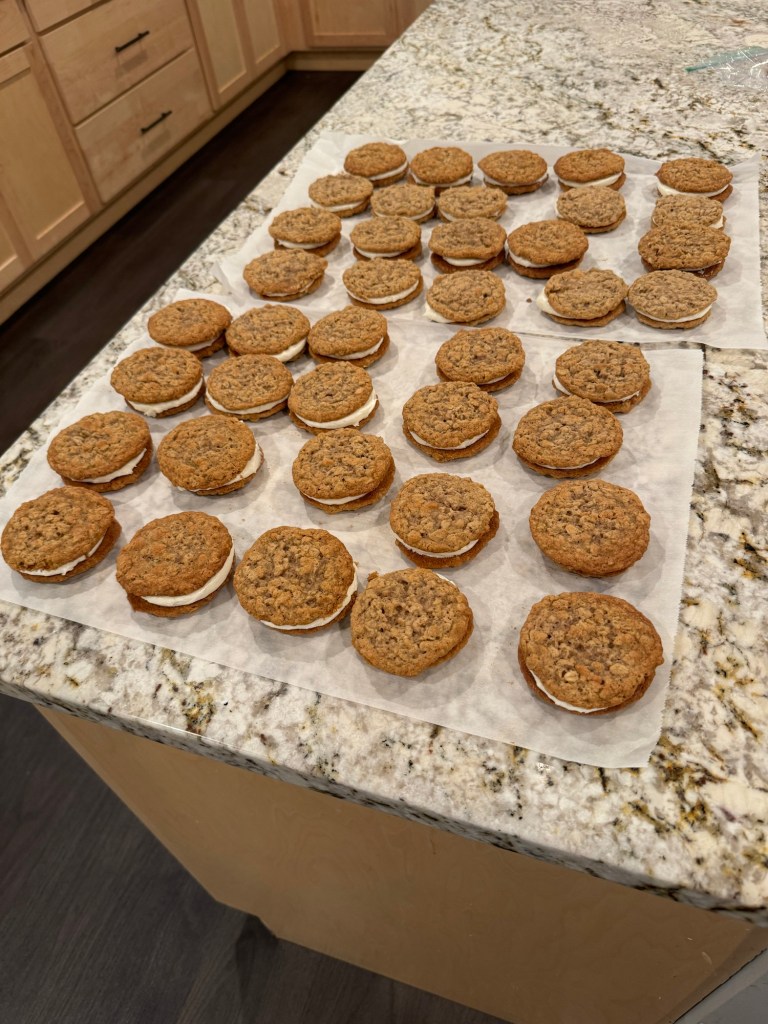
A delicious nostalgic treat that just might bring back fond memories.
It is my heart’s desire that the nostalgic aroma and flavor of freshly baked cookies make our residents at Beehive Homes of Oregon feel like they are at home.
boo′by trap` n. 1. ahiddenbomb or mine that can be set off by an unsuspecting person who steps on it, touches a tripwire, or the like. 2. any hidden trap set for an unsuspecting person.
My grandkids know there is a closet shelf with a little stash of old-school vintage games at Grandma Cindie’s house. When they were younger, we’d play some of those games together when they came to visit. In those days, it didn’t seem to matter that my games weren’t played on a device or a big screen. It was the time spent together enjoying one another’s company that mattered. Of course, it didn’t hurt if grandma had freshly baked cookies or a favorite snack on hand.
May this little missive of mine encourage someone navigating a similar road in life.
Engaging in conversations with the family members is one of my favorite things to do as I work on preparing desserts in the kitchen of BeeHive Assisted Living and Memory Care. Since both my mom and my brother have lived there, my heart knows what they are experiencing as they partner with Beehive to care for someone that they love. It has now been five years since my sweet momma left behind the shackles of her earthly body and mind and quietly moved into her heavenly home.
I’m sharing the post that follows in honor of my mom–a little reminisce of things mom and I experienced in the early days of her stay at BeeHive. When I wrote the post that follows back in 2019, mom was living in BeeHive’s first building. In the months that followed, she would sit at her bedroom window watching as the second neighboring building was constructed. God has blessed and a third building is now nearing completion. My prayer for BeeHive is that many more families will experience the care that my loved ones and I received. May this little missive of mine encourage someone navigating a similar road in life.
We’re back from our Hawaiian adventure with Mia. What a grand adventure.
Now I am settling back into the comfort of life’s routine. Sleeping in my own bed with my favorite pillow. Spending Sunday with our church family. Doing laundry in my own washing machine and not having to put $7.00 worth of quarters into the machine for each load!
Today I slept in until my body woke me up….and was almost late for work. It brought me joy being in BeeHive’s kitchen baking up treats for our residents again (many thanks to Karen who filled in for me while I was away).
In the midst of my baking joy, my heart remembered that my journey with BeeHive began 5 years ago today. March 25, 2019 was the day I accepted the help of BeeHive in caring for my mother in her journey Home with Alzheimer’s.
Facebook confirmed that memory with two reminisce posts. Many of my friends and family were praying as I moved Momma out of my home and into her new bedroom at BeeHive. We arrived just in time for lunch. While mom and I ate lunch, Wayne and Beth moved mom’s things into her new room, setting it up much like her bedroom in my home. After lunch, I walked mom into her new space and she settled right in and was soon napping.
I sat in her room watching her sleep for a bit, then met with Gina to go over some move-in details. When we were finished, I was not quite sure what to do with myself. I wrote about that here…
Momma would live here for the last 14 months of her sojourn on earth. Here she would be loved and cared for with the level of care I could not provide. She had friends around her, good food, fun activities, someone to help her every hour of the day or night, and someone to help her to shower (something I couldn’t offer her at my house).
Placing her in assisted living memory care was a hard decision. And the right decision.
I have three reasons why I would make this excellent article required reading for anyone even remotely involved in dementia care:
My mother had Alzheimer’s. I wish I would have been able to read this while I was caring for my mother with Alzheimer’s.
My mom lived in assisted living memory care for the last year of her life. She received fantastic care, but this would have been very helpful training for her caregivers.
My brother has vascular dementia and currently lives in a skilled nursing facility (a nursing home). I wish that everyone who works there would read this–it would be so helpful.
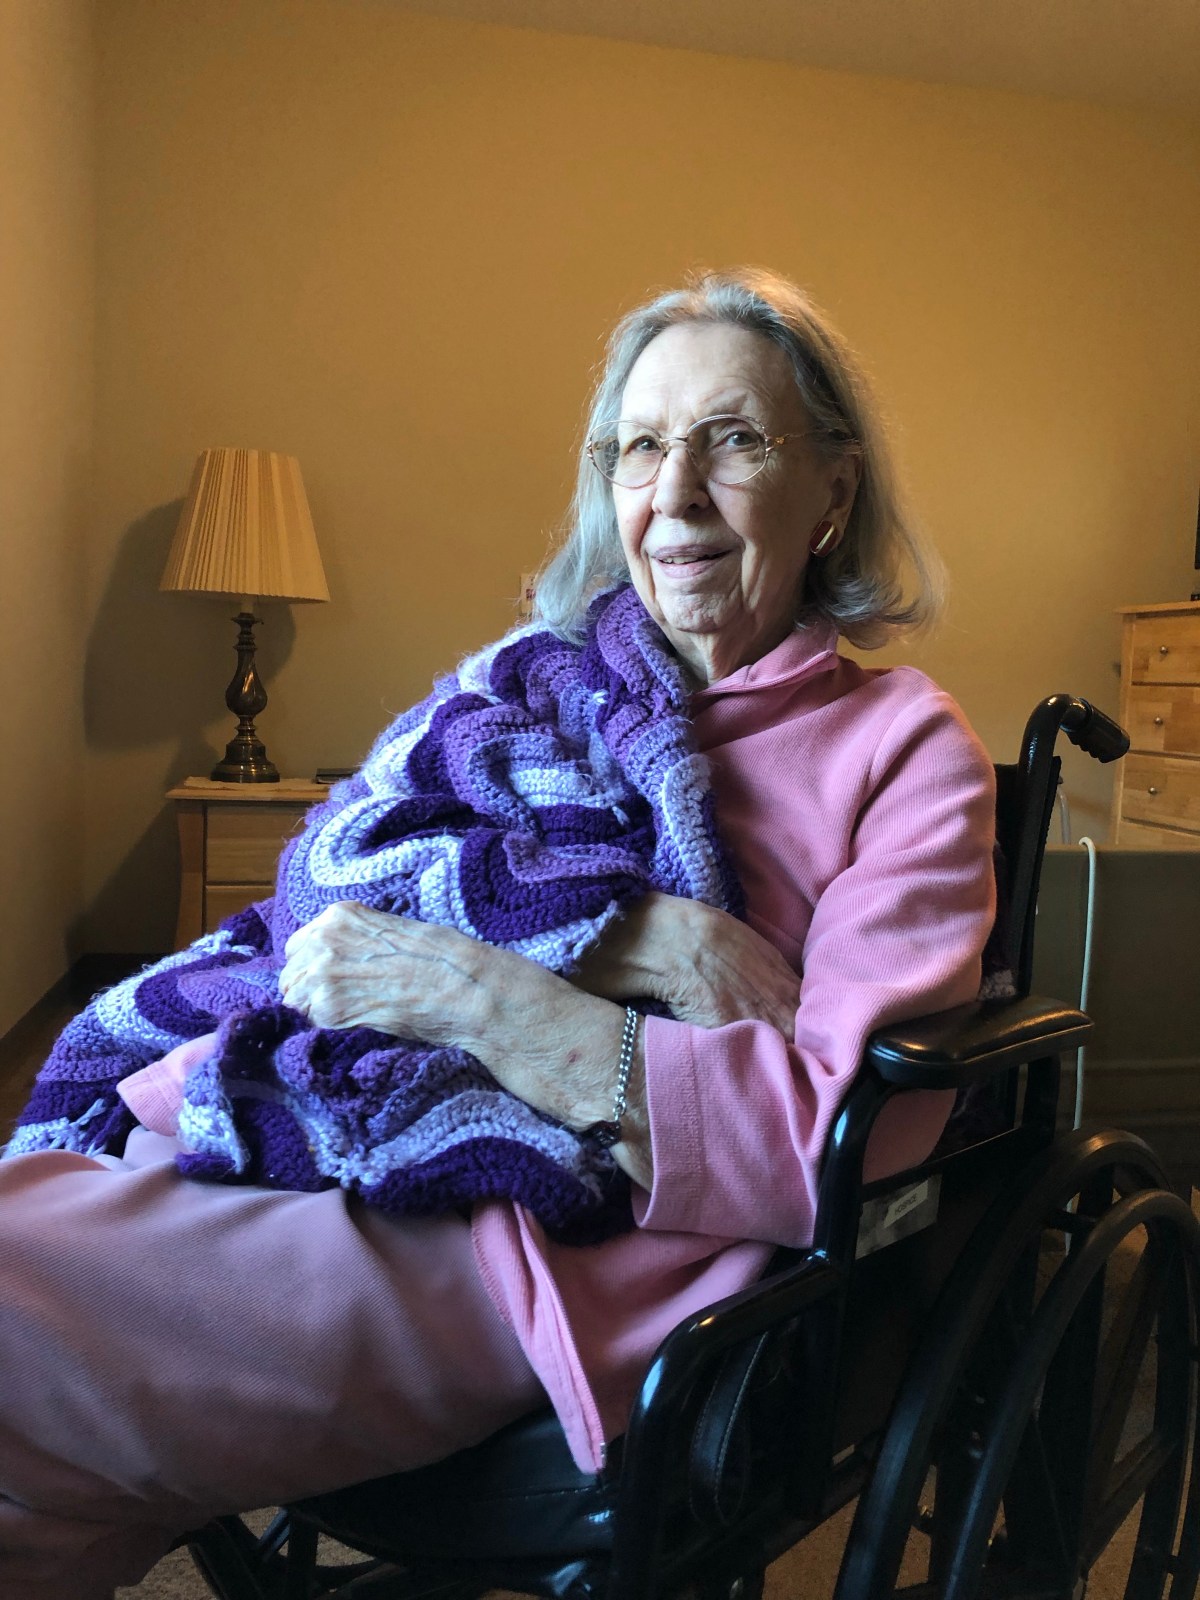
It’s January 17, 2024 and today would have been my sweet Momma’s 90th birthday. It’s nearly midnight and sleep has not yet come to my weary eyes, so I decided I would not let this day pass without taking a moment to acknowledge the great blessing God gave me in this lovely woman.
The last birthday I celebrated with her was her 86th. Mom didn’t participate much in the celebration. There was a delicious cake, a bouquet of flowers, a few gifts to unwrap, and cute birthday balloons. But Alzheimer’s had already taken away her ability to understand what the joyous fuss was about. She enjoyed eating the cake I made her, so that blessed my heart.
While I cannot bake her another cake today, I can stop and thank God for blessing this world with Charlotte Louise Peet Boyles–the woman I would call Momma.
“Charm is deceitful and beauty is passing, but a woman who fears the Lord, she shall be praised. Give her of the fruit of her hands, and let her own works praise her in the gates.”
If you are a caregiver for a loved one with dementia (or some other form of life-altering illness), there may come a day when you realize you need to consider other options for providing the best care. Perhaps the post that follows will be helpful as you wrestle with that important decision.
I typically bake at BeeHive Assisted Living and Memory Care on Mondays and Thursdays. I don’t like tantalizing people with the aroma of fresh baked goods and then saying, “Sorry, that’s for tomorrow.” So, Monday is my coffee cake day and Thursday is the day for fresh from the oven baked cookies.
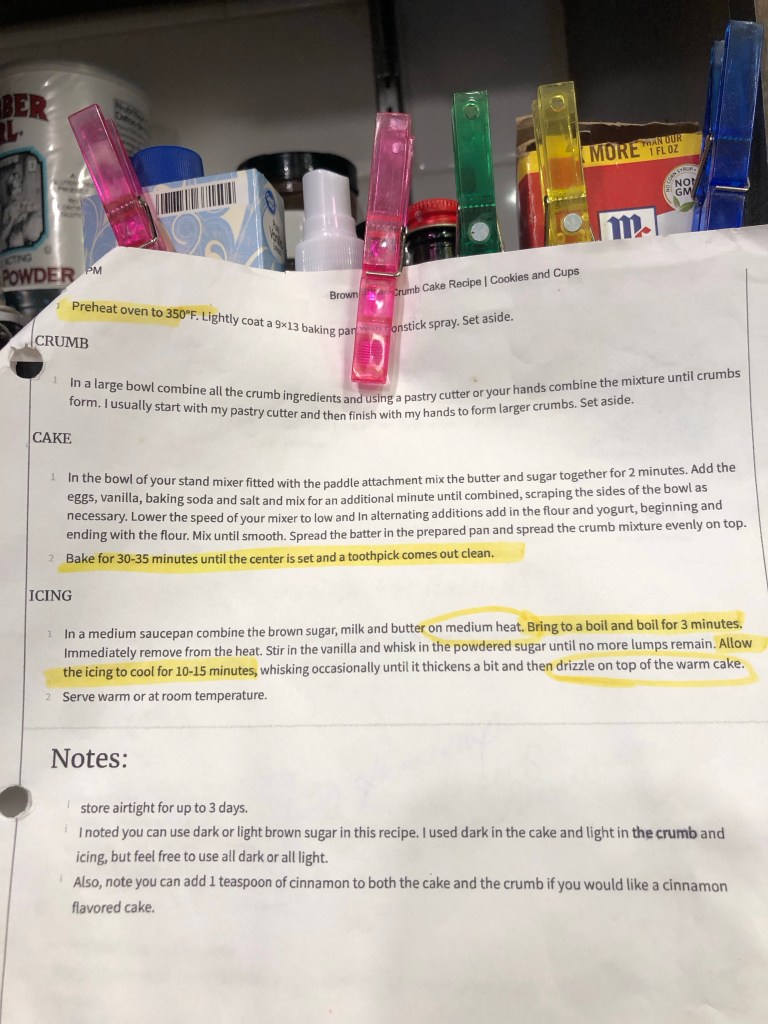
I have developed a general 4-week plan, so many desserts repeat every 4 weeks, rarely repeating a particular dessert during that time. It’s SO fun. Today, I’m going to share the recipe for Brown Sugar Crumb Cake.
My copy of the recipe — my scribbles and all.
I’d like to give a shoutout and huge word of thanks to Shelly Jaronsky. I found Shelly’s recipe via Pinterest on her sweet website Cookies and Cups. I encourage you to check out the other yummy recipes on her site too. If you’d like to print your own copy of this brown sugar amazingness, just click here.
Shelly’s recipe description of this cake says it all:
The ULTIMATE Crumb Cake Recipe!! Brown Sugar Crumb Cake is a brown sugar twist on your usual coffee cake! It’s a rich and soft brown sugar cake topped with a thick layer of brown sugar crumbs AND a brown sugar icing!
Coffee cake batter
I’m baking for 32 people, so make two 9×13″ pans of this recipe. I double the cake batter recipe, substituting sour cream for the Greek yogurt. I generally use light brown sugar; but, if I happen to have dark brown sugar, I use half dark and half light. I’m also very generous with vanilla extract, adding an extra teaspoon. A big scoop helps me distribute the double batch of batter evenly between the two pans.
Brown Sugar Streusel
A double recipe of this brown sugar streusel deliciousness would be amazing, but a single recipe will amply cover both coffee cakes with crumbs. For the best crumb, make sure your butter is cold. I use a bench scraper to slice each stick lengthwise, then cut into small cubes. A pastry cutter works beautifully in the task of cutting the butter into the sugar/flour mixture. It’s ready when you can lightly squeeze a handful of the crumbs and they hold together.
Bake these at 350 for 25-30 minutes, or until it tests done. It might need a few extra minutes, but be careful you don’t overbake it. While it’s baking, make up a batch of the Caramel Topping.
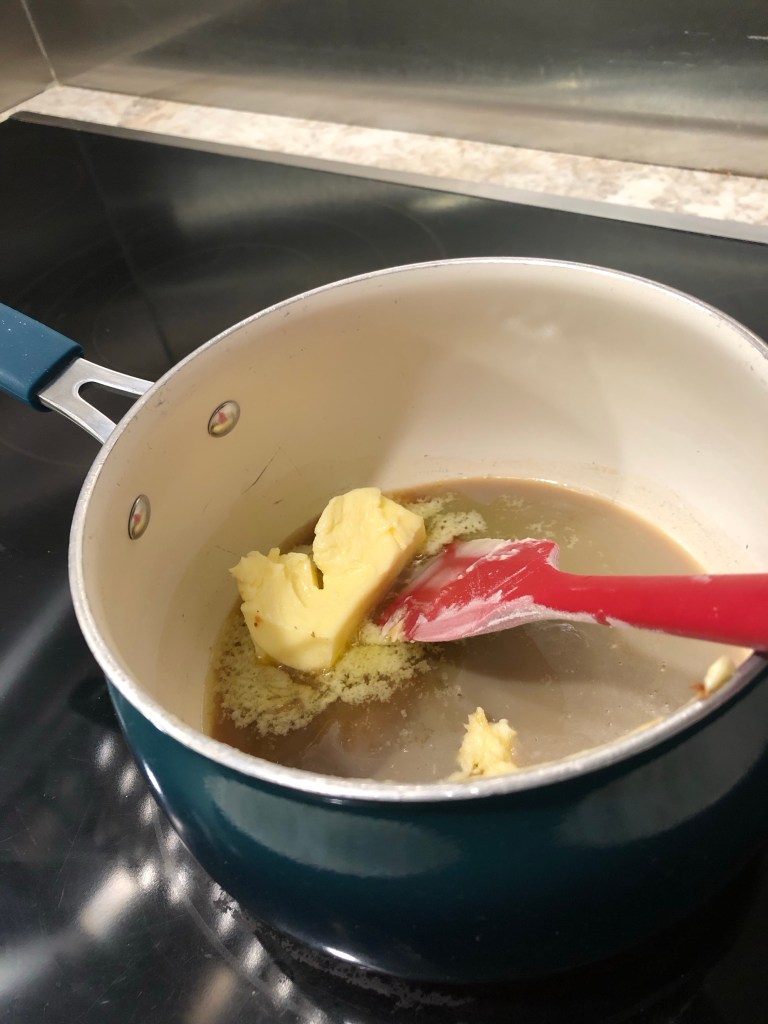
Caramel Topping
You can go ahead and make a double batch, but as with the streusel, I find that a single batch of the caramel topping is enough to generously drizzle over both cakes while they are still warm.
It’s always a good sign when it gets real quiet in our dining room when dessert is served. That means the dessert is being enjoyed. There are smiles all around and a few thumbs up from happy diners.
I am blessed to be a part-time baker at BeeHive Assisted Living and Memory Care in Oregon, Wisconsin. It’s my joy to see my desserts put a smile on the faces of our residents. I thought it would be fun to share a few recipes with my readers. Enjoy!
Recipes which begin with a graham cracker or cookie crust are some of my personal favorites to create. Banana Split Torte is actually a no-bake recipe, so perfect for summers–but I make it once a month all year-round because it’s a BeeHive favorite. Since many of our residents are experiencing short-term memory loss in its various forms, I like to choose vintage recipes they might remember from their younger days. This one fits the bill. Most of the ladies remember taking this classic to potlucks and family gatherings.
There are three days each week where refrigerator space is available (the days just before grocery shopping day), so those are the days I choose to prepare dessert recipes which require refrigeration. It can be prepared one day in advance. Making it too far ahead will mean the bananas will begin to brown–still tasty, but not as appealing to the eye.
The pineapple can be sweetened or unsweetened, according to your preference, but make sure it is well-drained. Don’t just dump it in a colander and call it done. Press the juices out. I also like to count out the number of cherries I need for garnish and drain the juice off of them too by setting them on a paper towel so that the juices can bleed off. It makes for a prettier presentation later.
I’ve included the recipe I use as a guide. I make two 9×13 pans and cut each dessert into 16-18 servings. You can most certainly divide this recipe in half for a single 9×13 dessert.
Recipes are a guide. Use your common sense, personal experience and tastes to tweak the recipe, as you’ll see in this photo of my recipe page (above).
The Graham Cracker Crust
Kudos to you if you can make a decent graham cracker crust out of 1/3 cup margarine and 3 cups of graham crackers crumbs like this recipe states. I personally want a dessert crust that’s not going to fall apart when cut. If that’s your goal too, use 2 sticks of melted butter, 3 cups of graham cracker crumbs and 1/2 cup of granulated sugar. Toss the mixture well. Split the buttery crumbs evenly between the two pans. To get a firmly pressed and smooth crust, I use a wide spatula to press the crumbs into place, then pop them into the fridge to firm up a bit while I prepare the filling. [Note: you can substitute crushed Nilla Wafers for the graham crackers–just omit the 1/2 cup of sugar.]
Cream Cheese Filling
Here’s my tweak on the filling. I cream 3 packages (8 oz each) of softened cream cheese with 1 stick of softened butter. Then I add at least 2 teaspoons of vanilla…probably more like 1 tablespoon (because I’m really into vanilla). Next, I dump about 3 1/2 cups of powdered sugar (confectioner’s sugar) into the bowl with the creamed butter and cheese. Turn the mixer on very low to stir in the powdered sugar then turn that mixer up to medium-high and let it do its thing for about 5 minutes, scraping that bowl a few times to make sure all of the ingredients reach the super-fluffy and wonderful stage. Yep, it’s kinda like a thick layer of frosting. Yes, you can leave the butter out, but be forewarned. If you do something as crazy as that to save calories, you’ll sacrifice a lot of amazingness and will probably need to add the milk I crossed off the recipe to get it to a good spreading consistency.
For maximum fluff, beat at medium-high speed at least 5 minutes
Once you have a bowlful of silky cream cheese fluff, remove those crusts from the fridge. I then use a cookie or ice-cream scoop to evenly distribute globs of that cream cheese fluff around in the pans, then smooth it around with a small silicone or offset spatula.
A different dessert, but this is the technique I use for distributing the filling.
Banana Split Topping Layer
Now’s the time to slice those bananas into little coins and sprinkle a tablespoon or two of lemon juice over them. Toss the bananas around a bit in the lemon juice (this helps prevent browning). Using 3 bananas per pan (4 if the bananas are small), I lay the banana coins all over the top of that yummy cream cheese filling. [As you can see in my scribbles on the recipe, I sometimes make a “patriotic” version of this dessert, substituting fresh blueberries and strawberries for the bananas. Equally delicious.] Once you’ve got those bananas distributed evenly, cover the top with crushed pineapple.
Don’t cheat the people who like the edge pieces–get that fruity goodness to the edge of the pan!
The last layer
The last layer is your whipped topping. At work, I use Cool Whip or something of that nature. This dessert is extra-delicious if you top it with sweetened whipped heavy cream. If you go the homemade route, be sure to stabilize the whip cream if the dessert will not be served the same day.
The last thing I do is drag the tip of a knife through the whipped topping to create a grid for the cherries. Not everyone has mastered the skill of cutting 9×13 desserts into equal pieces, so I like to give the kitchen staff a little visual guide. The grid also helps me in placement of the well-drained maraschino cherries. Cover this dessert and tuck that amazingness back into your fridge again to chill for a few hours if you’re serving same day, or overnight for something to look forward to tomorrow.
The grid varies depending upon how many servings I need
At serving time, follow the grid marks and cut your pretty dessert into servings. I guarantee, there will be no leftovers. That is, unless you’re making it for yourself. If that’s the case, you might want to save a piece or two for tomorrow.